QUICK DEV TIP #74 UE4 / UE5 - OPTIMISING TICK RATE
Here is something thats useful to know about!
Did you know you can optimise your tick rate per blueprint?
If you would prefer to watch the video version, check it out here
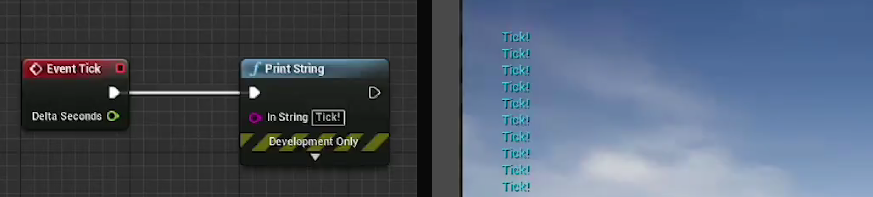
There are a few different ways of doing this and it depends on the situation and people’s personal preference, so keep that in mind. If you open up a blueprint and run a print string directly off tick then when you play in editor you will see a constant tick on your screen.
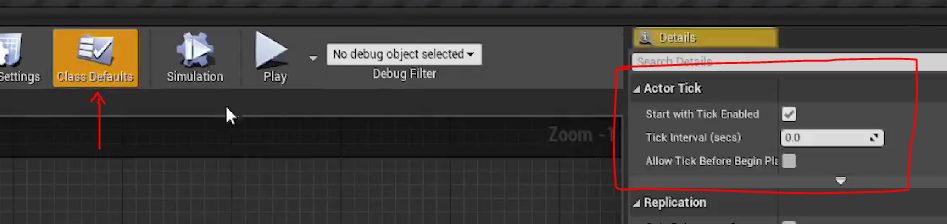
We can change the rate of this tick so it is more optimised by going to Class Defaults in the blueprint and then looking over to the Actor Tick section of the details panel.
We can adjust the Tick Interval (secs) to adjust the frequency of the tick in the blueprint. In my example I am setting it as 0.5.
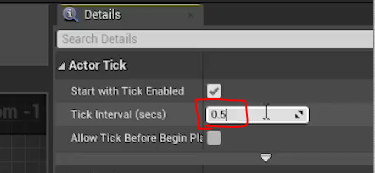
So now you will see that if we play in editor, instead of getting a constant print, we only get a print every half a second. This is a nice clean way of optimising your tick rate.

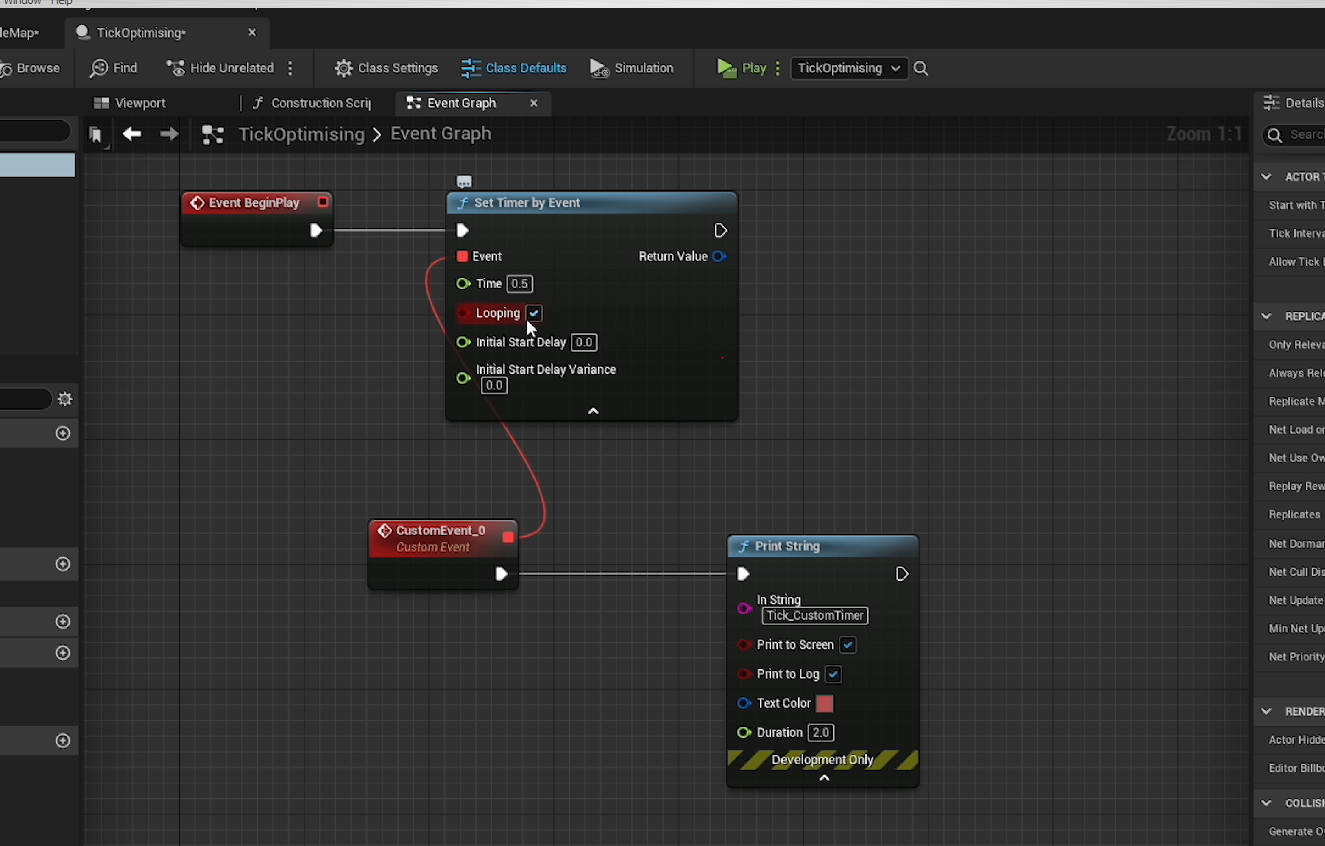
We can also do this another way. Which is to create your own custom timer. Some people like this some people don't. So take this with a pinch of salt. If you search for Set timer by Event you will find the node that we are looking for.

First off we want to set Looping bool to true. This will do exactly what it says, make it so the timer repeats.

Then we need to set a time, which is effectively our frequency. You need to be a little bit careful here that you don’t use a frequency that’s so fast that it is actually less optimised than tick. If you make it too fast then its going to fire multiple times a frame, which would be pointless. Generally you want to avoid going any lower than 0.1 - 0.05.

If you look at the bottom of the node you can see a little drop down, where we can find a few more settings. Such as Initial Start Delay and Initial Start Delay Variance. We wont be using these in our example but they are useful to know about.

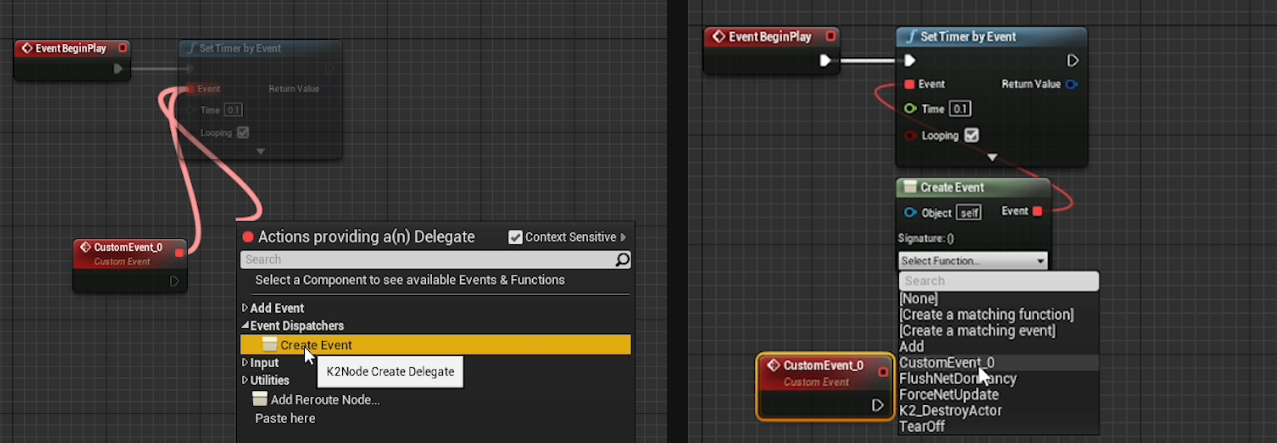
Next up, if you drag off the Event pin (the event delegate) and under the Add Event drop down we can use Add Custom Event. It is from here that we can start to build the functionality as this will get called every X seconds of the Time value that you previously set.
If you don’t the idea of cables crossing over other nodes we can also set this up another way. When dragging off the event pin we can instead use the Event Dispatcher drop down and select Create Event. This will create a new node which we can select an event in our scene that works with it. This is my person preference for setting up an Set Time by Event node.
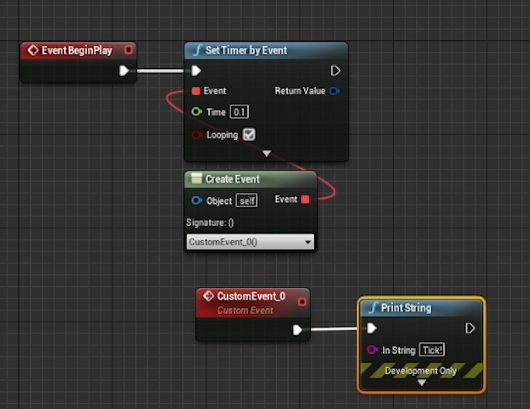
We can then add whatever functionality we want off our custom event as you can see below. In my example every 0.1 seconds we will run the print string “Tick!”
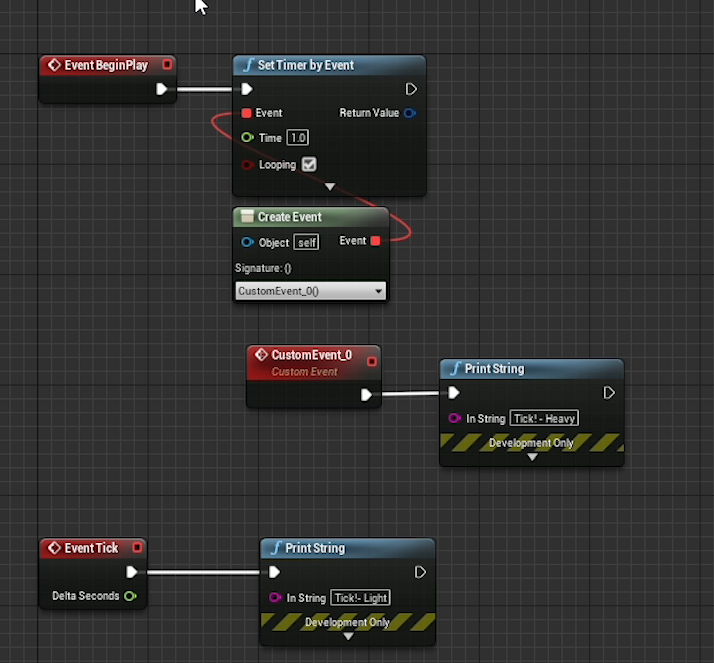
I wanted to show both these methods because I think it can be useful to know about them both as you can use them simultaneously. In my hypothetical example below I am running 2 different timers; a fast and a slow one. My “light functionality” is on a fast Event Tick. Then I am running some more “heavy functionality” on a custom timer that only happens every second. This allows me to keep things more optimised than if I was running everything on Tick.
These things work exactly the same in UE5 as well. The UI looks a little different but you can still get to a blueprints Actor Tick settings by clicking on Class Defaults at the top of the window.

As well as setting up your own timer using the Set Timer by Event node (Remembering to not go too quick on the Time variable as you will void potential optimisation gains).
Take this all into consideration when optimising! and if in doubt use the cleaner method of setting your tick rate; using Tick Interval (secs) under Class Defaults and the Actor Tick Category in the details panel.
Want to know when I release new quick Unreal tips & tricks?
Enjoyed this? Check out my other work: