QUICK DEV TIP #107 UE5 - Orbit Camera Mode
Even if you have been using Unreal for years, here’s something you might not have known about!
Did you know you can use an orbit camera mode instead of freelook in a bunch of places around the editor?
If you would prefer to watch my video version, check it out here
The normal freeview mode is great for moving around levels, etc. However, when viewing a singular asset, orbiting around the asset in question can help you more easily get the view angle you want.
Below, you can see what I mean by orbiting in the level viewport. Orbiting is simple to do, but it works differently depending on the type of asset you are viewing. Read on, and I’ll show you how you can use it.
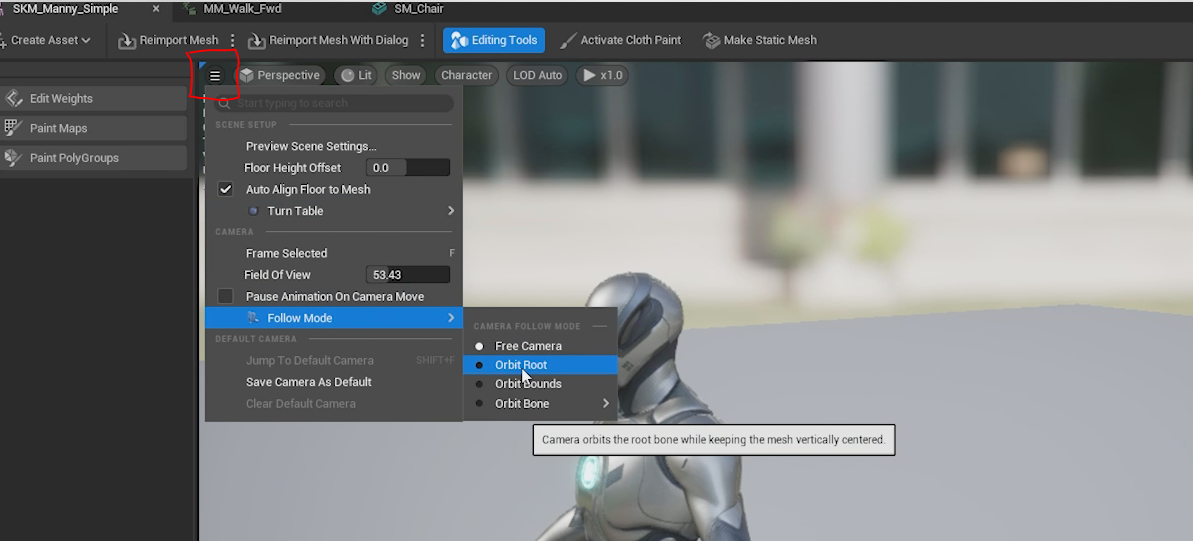
Let’s start with skeletal meshes. In the top-left of the skel mesh viewer, click the button with three horizontal lines. This will open a dropdown. Under that, hover over Follow Mode, then choose Orbit Root. While there are other Camera Follow Modes available, I typically only use Free Camera and Orbit Root.
Now, if you move the mouse while holding down the left mouse button, the view will orbit nicely around the skel mesh, as you can see below.
You can also use the mouse wheel to zoom in and out.
By default, the pivot will be at the center of the character. However, you can adjust the location of this pivot by holding the middle mouse button and moving your mouse. Below, you can see how I raise the pivot to the head of the skel mesh.
When moving the pivot, it’s easy to mess things up. No worries though, pressing F on your keyboard will reset the view and pivot back to the center of the character.
Orbiting can be activated in exactly the same when when viewing animations as well. Top left button, Follow Mode, Orbit Root. The controls are exactly the same as well: left mouse click and hold to rotate, mouse wheel to zoom, middle mouse button to move the pivot and F to reset the pivot.

Next up is orbiting static meshes, and they work differently. If we look at the top left area, there is no option to orbit here. We instead need to rely only on keyboard and mouse buttons to make it work.

When looking at an asset in the static mesh viewer, if you hold Left Alt and then hold down the Left Mouse Nutton, when you move your mouse, you will orbit the camera. The rest of the controls are the same as mentioned before: mouse wheel to zoom, middle mouse button to move the pivot and F to reset the pivot.
Sometimes, as you can see in the GIF below, orbiting static meshes gets offset from the actual asset. This is because we are orbiting around a pivot roughly where the center of the screen is. We can easily fix this by pressing F again to reset the pivot and center back in on the asset itself.
Oribiting assets in your level is done in exactly the same way as we just learnt for the static mesh viewer. See it in action below
Like I said at the beginning, this orbit view can be a great way to get a nice view angle of the assets you're trying to look at. Whether you are trying to get some good shots for marketing materials, testing out shaders from different angles or just admiring your hard work, this is a great little tip to know about!
Want to know when I release new quick Unreal tips & tricks?
Enjoyed this? Check out my other work: